Workspace
Manage a Magistrala Workspace through editing metadata, roles and assigning users with roles.
Creating a Workspace
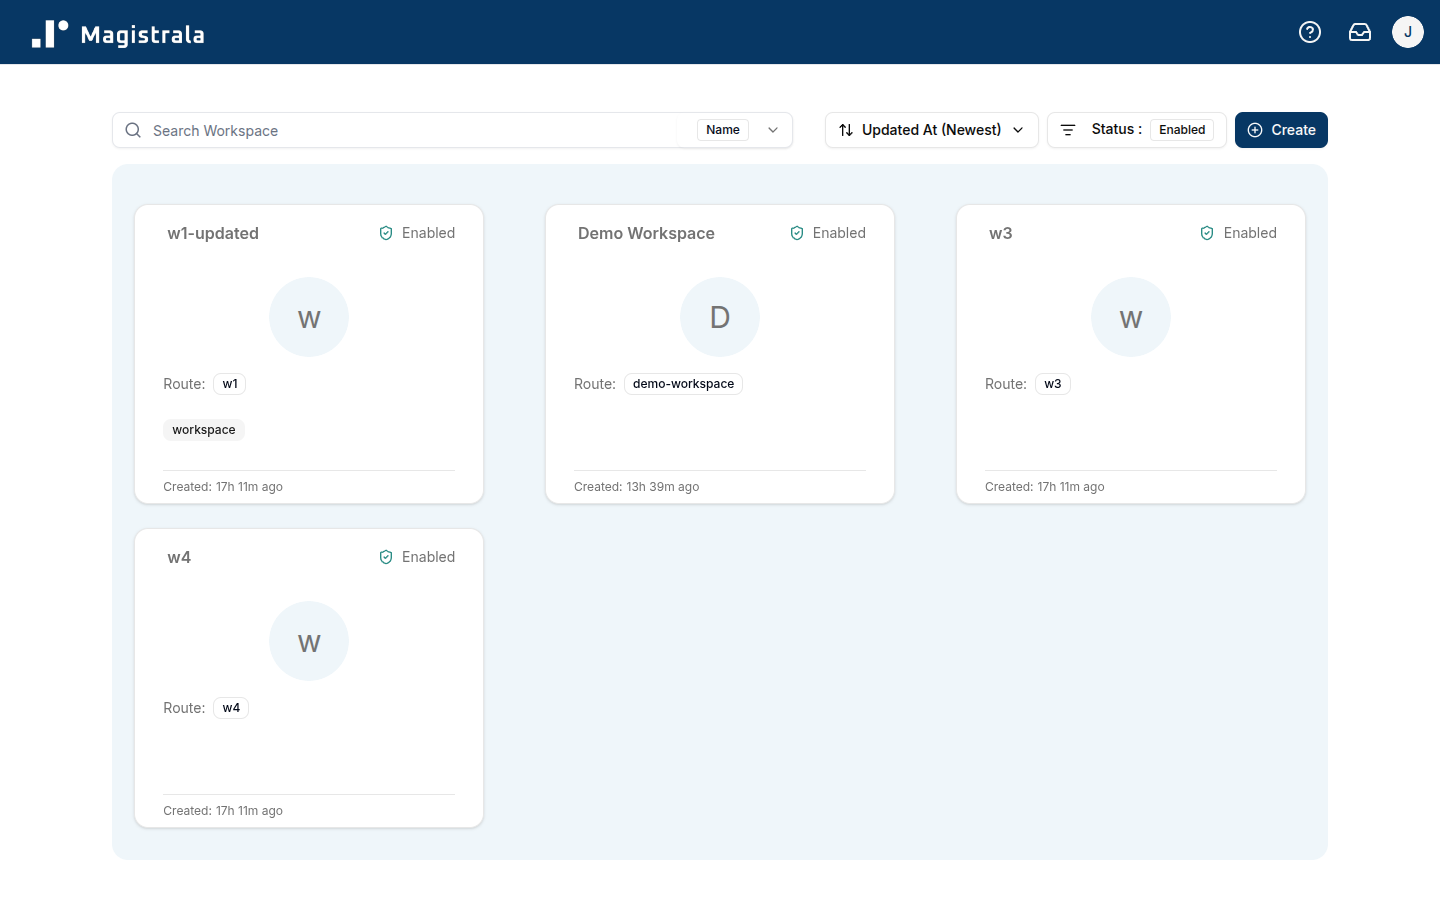
After logging in, the user is redirected to the Workspaces page.
If no workspaces exist, an empty state appears prompting the creation of a new one.
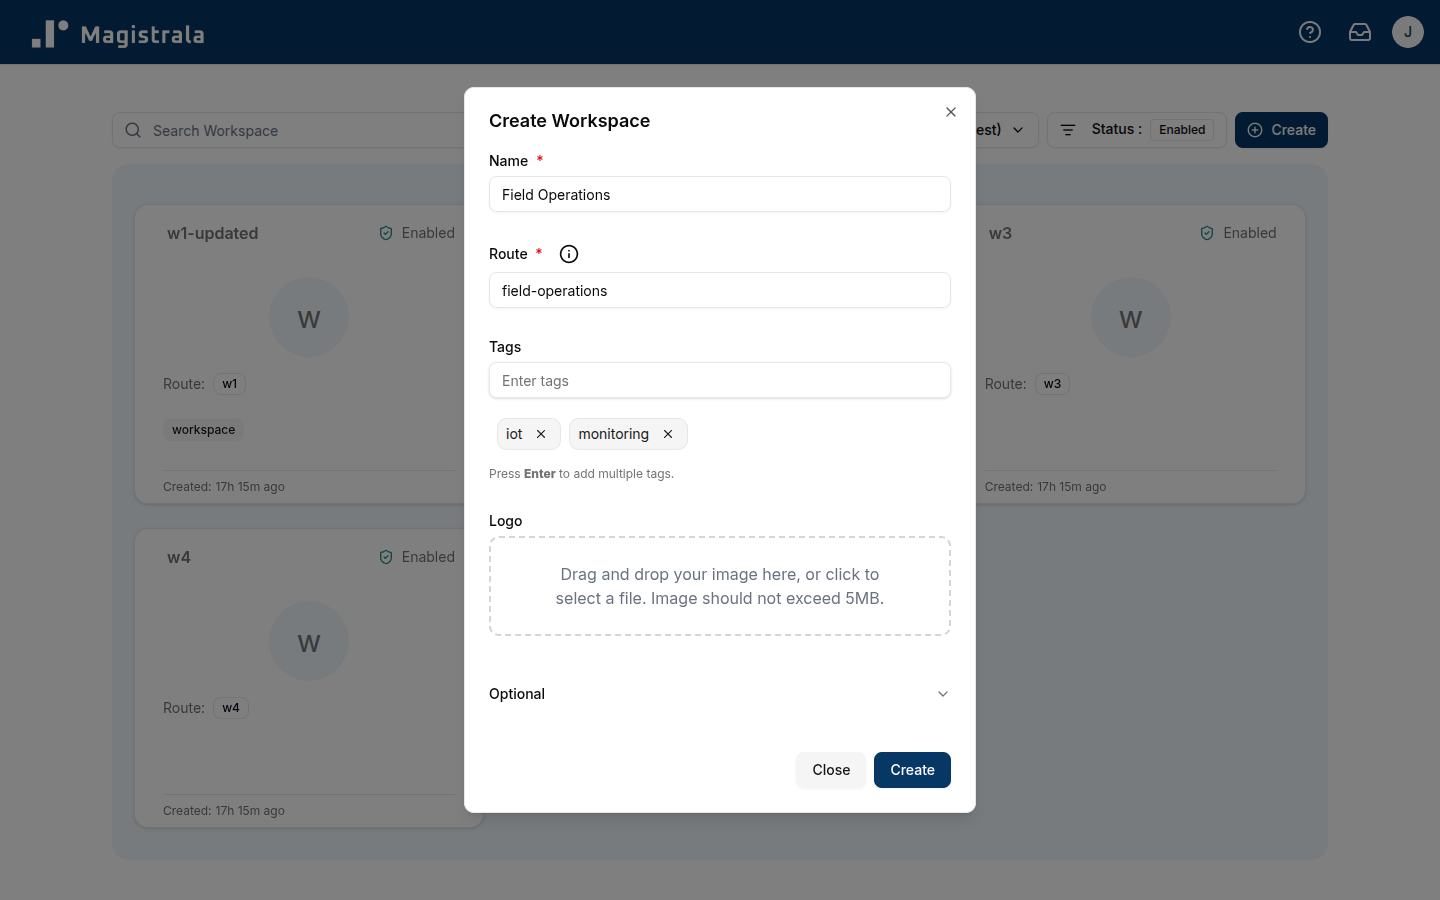
Clicking the + Create button opens the Create Workspace dialog.
The dialog presents fields for entering workspace details.
The primary fields are Name and Route, which are required.
Additional optional fields include Metadata, ID, Tags, and Logo.
- The Route field acts as a short, human-readable identifier and cannot be changed later.
- Metadata must be provided as a valid JSON object (for example:
{ "region": "EU" }, not a string). - The ID value is automatically generated if omitted.
- Tags can be used to categorize workspaces for improved organization and searchability.
- Logo supports image uploads up to 5 MB in size.
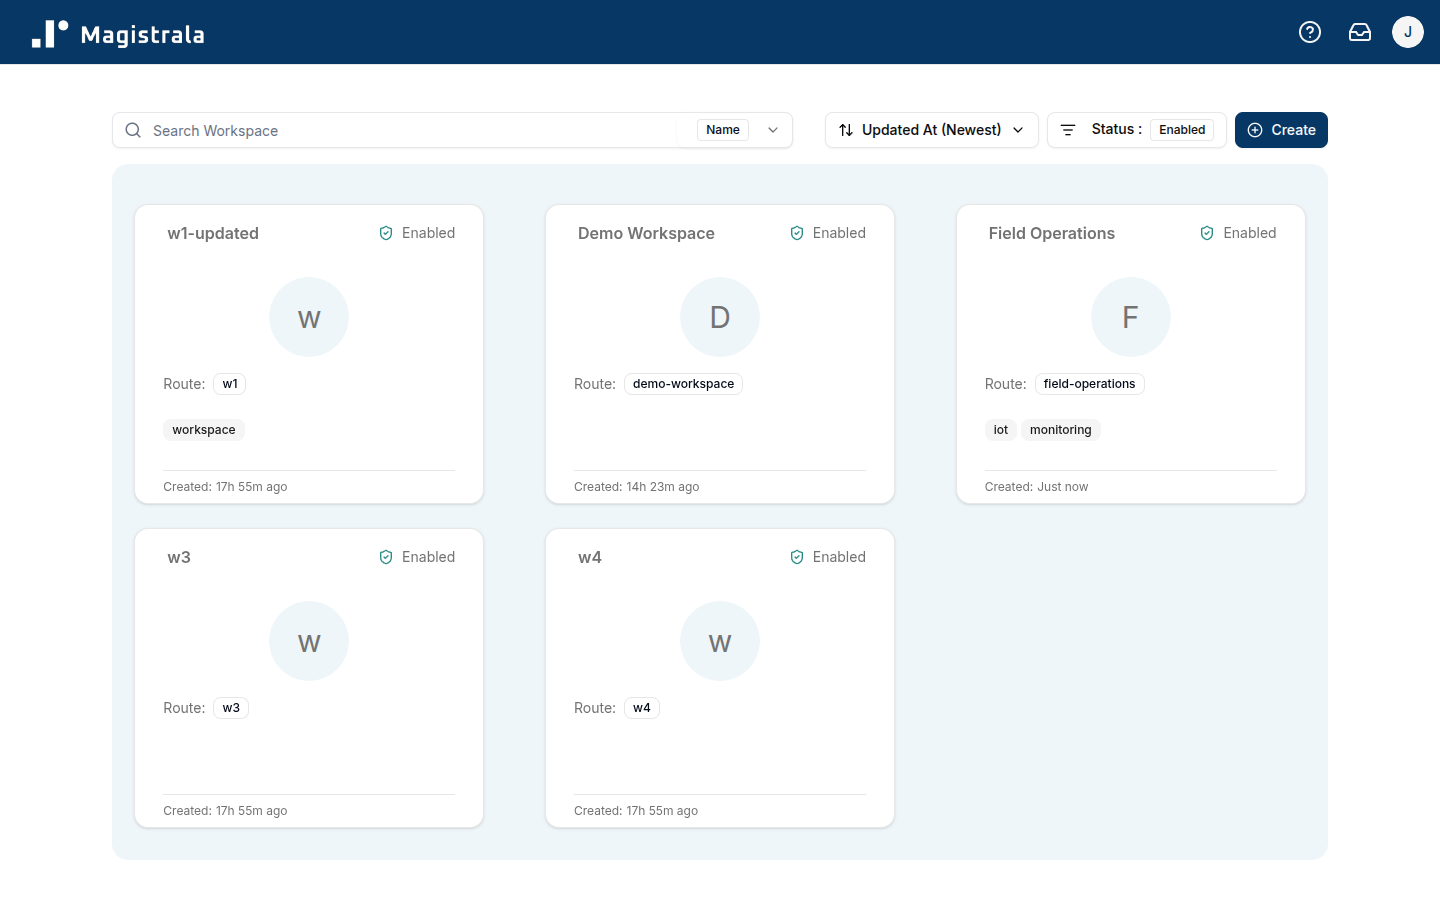
Once a workspace is successfully created, it appears on the Workspaces page as a card displaying its name, route, status and associated tags.
Selecting a workspace card initiates a session within that workspace.
This action redirects the user into the workspace, where workspace-specific entities such as devices, channels and groups can be managed.
Workspace Homepage
Upon entering a workspace, the system redirects to the Workspace Homepage.
This page provides an overview of all activities, entities, and limits within the selected workspace.
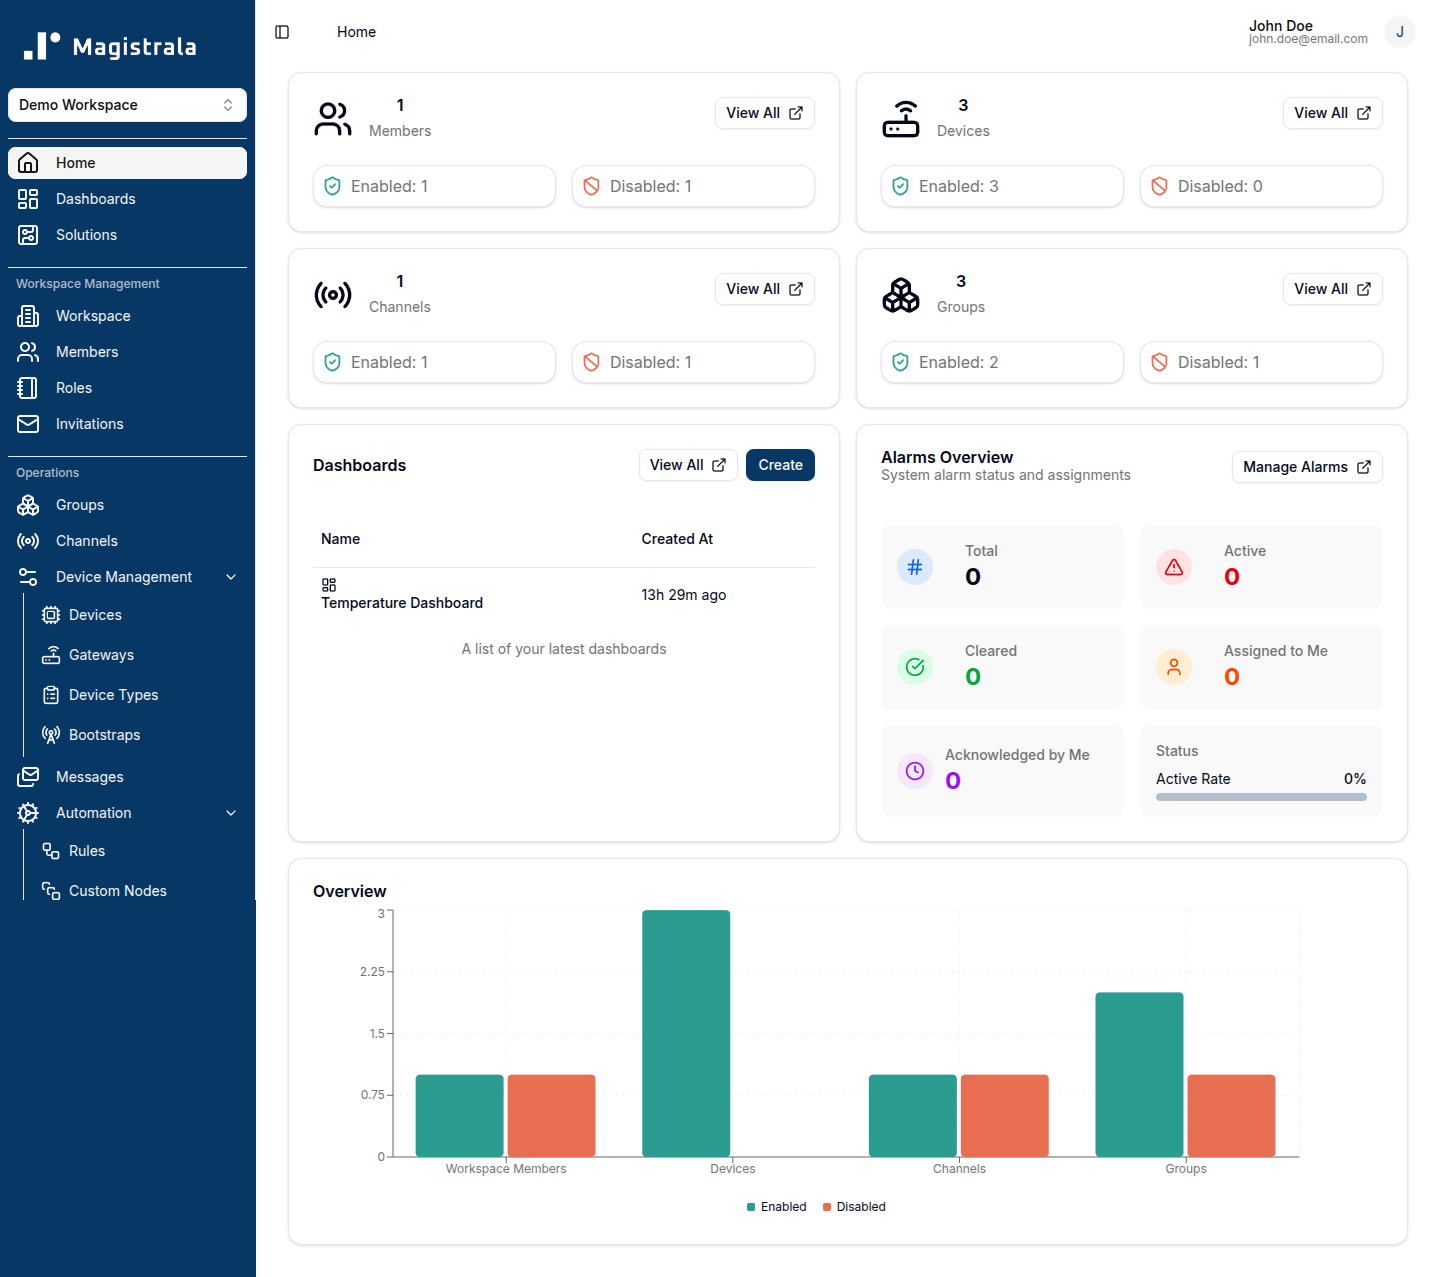
At the top of the page, a series of summary cards displays the current state of the workspace's entities:
- Members – Shows the total number of users assigned to the workspace, along with their enabled or disabled status.
The workspace creator is automatically assigned the admin role and appears as the first active member. - Devices – Displays the number of devices within the workspace and their operational status.
- Channels – Lists the channels available for message publishing and subscription.
- Groups – Indicates the total number of groups configured in the workspace.
Each card also includes a quick-access View All button for navigating directly to the detailed management page of that entity.
Dashboards
The Dashboards section on the Home page provides a quick summary of your existing dashboards within the current workspace.
It lists the Name and Created At columns, along with buttons to View All dashboards or Create a new one.
If no dashboards exist yet, a message appears prompting you to “Get started by creating a new one.”
This section helps you quickly access or create dashboards without navigating away from the Home page.
Alarms Overview
The Alarms Overview section summarizes active and historical alarms within the workspace.
It highlights alarms that are currently active, assigned or acknowledged, helping administrators quickly identify and manage system events that require attention.
Overview Chart
Below the summary cards, a bar graph presents a visual comparison of workspace entities such as members, devices, channels, and groups.
This graph mirrors the numeric information shown in the cards but offers a more immediate and visually intuitive representation of workspace activity.
The Workspace Homepage thus serves as a central dashboard for workspace-level monitoring, configuration, and resource management, providing both high-level insights and quick access to detailed sections.
Workspace Information
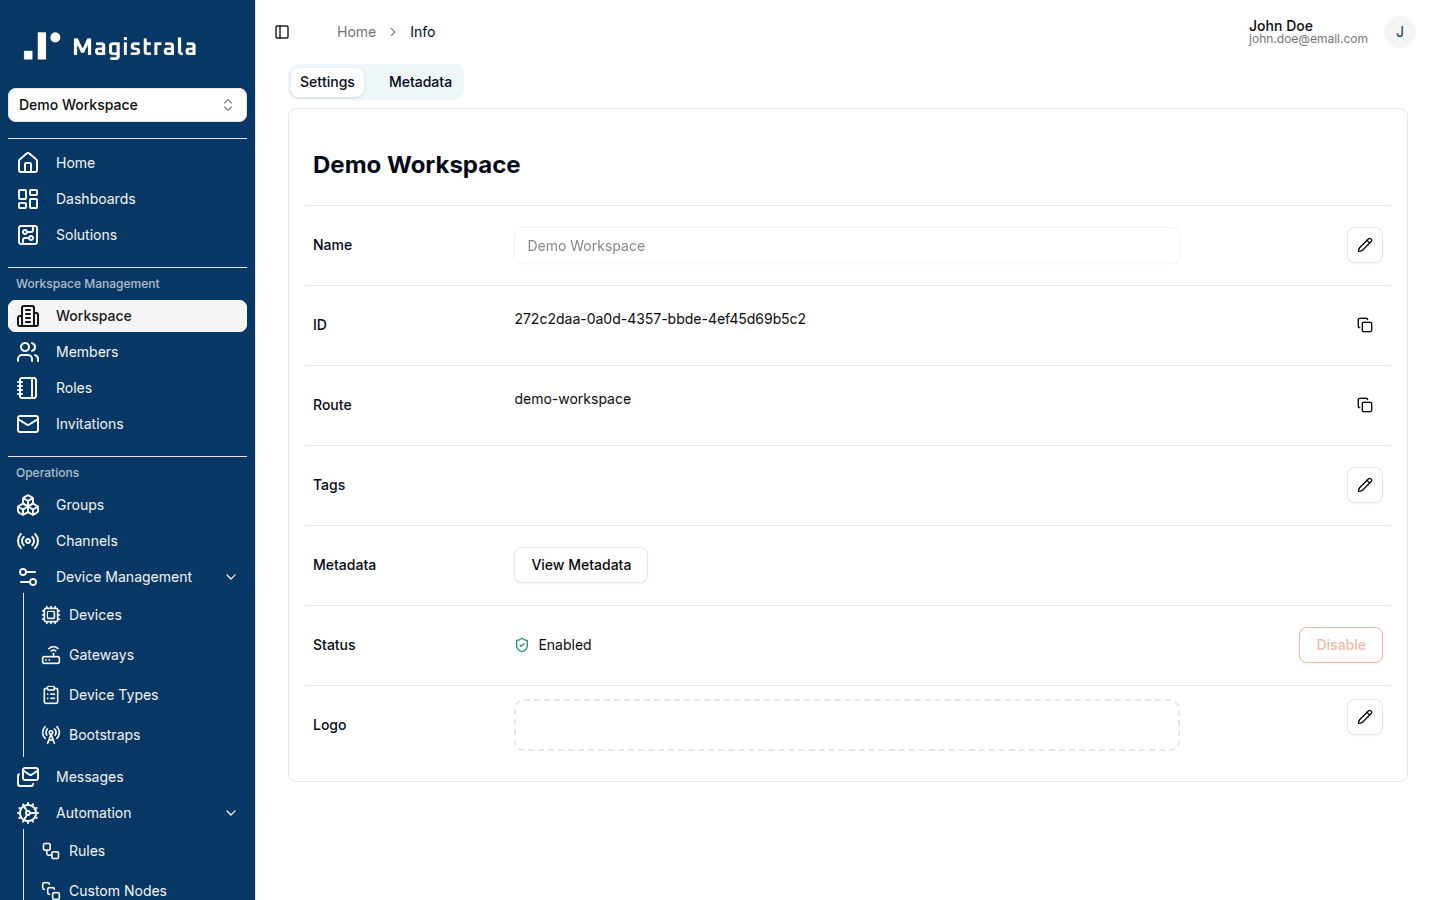
Navigate to the Workspace section in the side navigation under Workspace Management to access workspace details. The workspace information page has two tabs: Settings and Metadata.
Settings Tab
The Settings tab allows you to view and edit core workspace properties:
Editable Fields:
- Name – A descriptive label for the workspace
- Tags – Optional keywords for better organization and searchability
- Status – Enable or disable the workspace using the toggle switch
- Logo – An image (up to 5MB) that represents the workspace
View-Only Fields:
- ID – The globally unique identifier (UUID) for the workspace (copy button available)
- Route – A user-friendly identifier for the workspace (copy button available)
Note: The Route is set only during creation and cannot be changed later
- Metadata – View existing metadata in JSON format (managed in the Metadata tab)
The workspace status can be disabled by clicking the Disable button or enabled by the Enable button. Disabling the workspace will revoke access for users who aren't workspace admins.
Metadata Tab
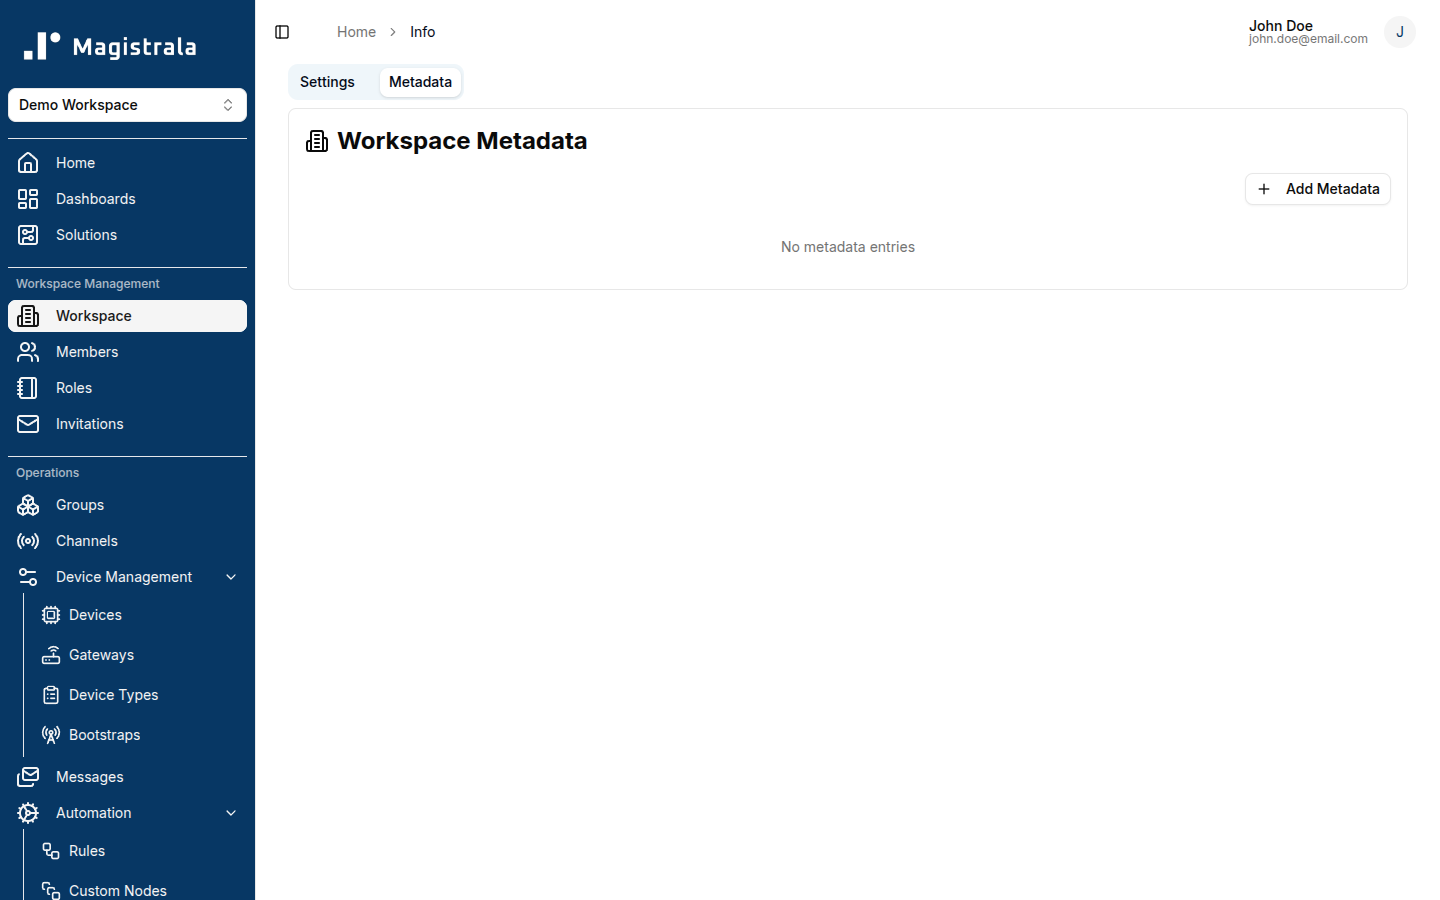
The Metadata tab allows you to add, view, and manage additional information for the workspace. Metadata supports various value types including text, numbers, booleans, JSON objects, locations, and perimeters.
For detailed instructions on managing metadata, including working with interactive maps for location and perimeter data, see the Metadata Management Guide.
Workspace Members
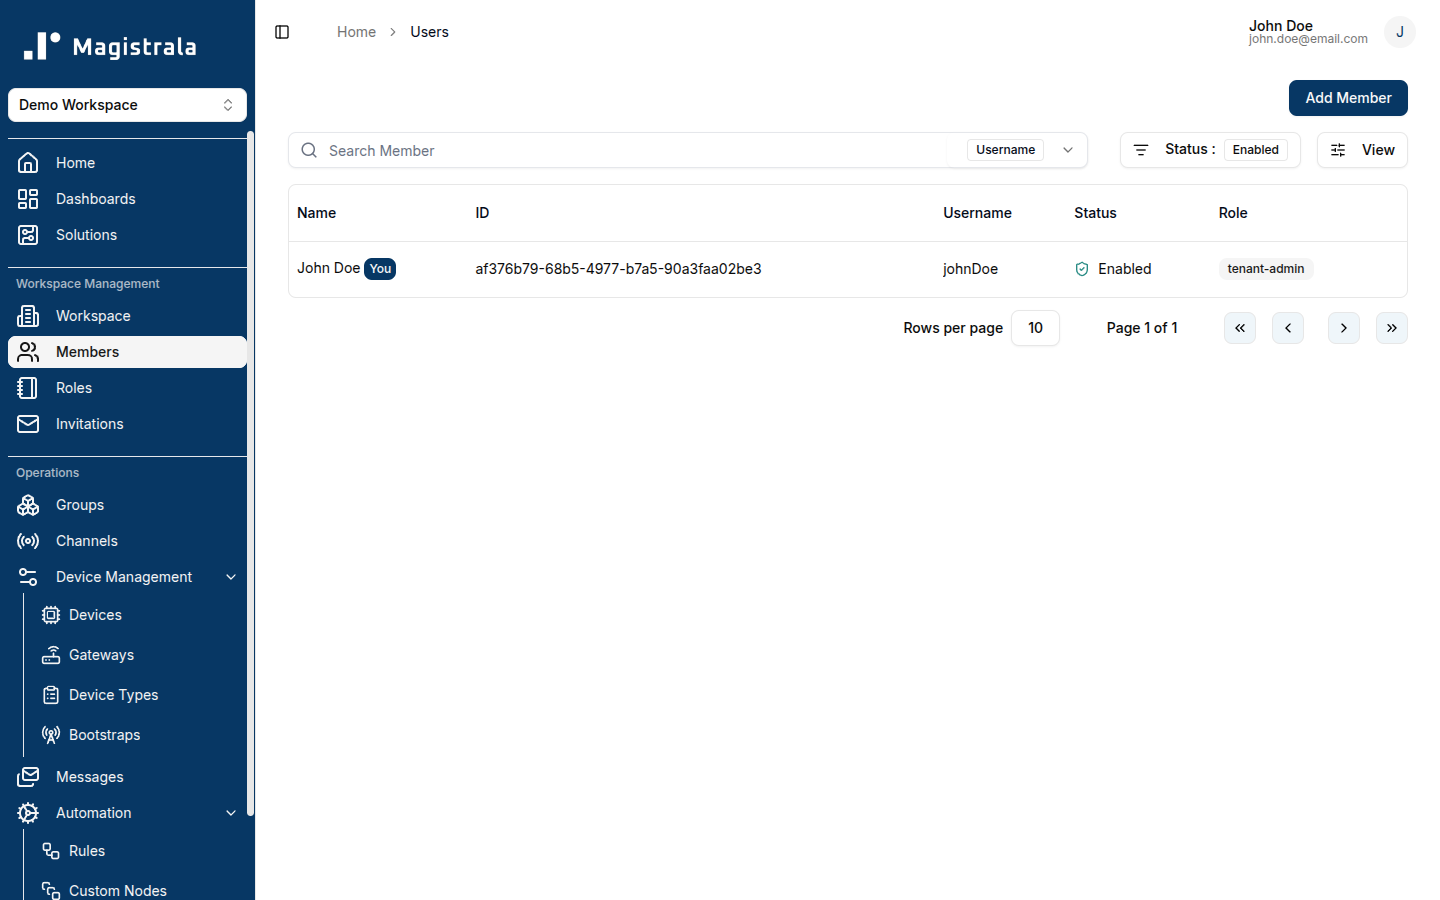
A Workspace Admin (or any member with the appropriate permission) can add users to a workspace and assign them a role.
Every member must have a role; roles determine what they can do across Devices, Channels, Groups, Dashboards, and other resources.
Important: The read permission is the most basic permission required for workspace access.
Without read, a user cannot view the workspace at all after signing in — not just specific entities.
Assign read to any user who needs to log in and see the workspace.
Members' effective permissions over entities depend on the role they're assigned.
Users with additional permissions (e.g., Write, Manage) can perform actions as allowed by that role.
Assign Users
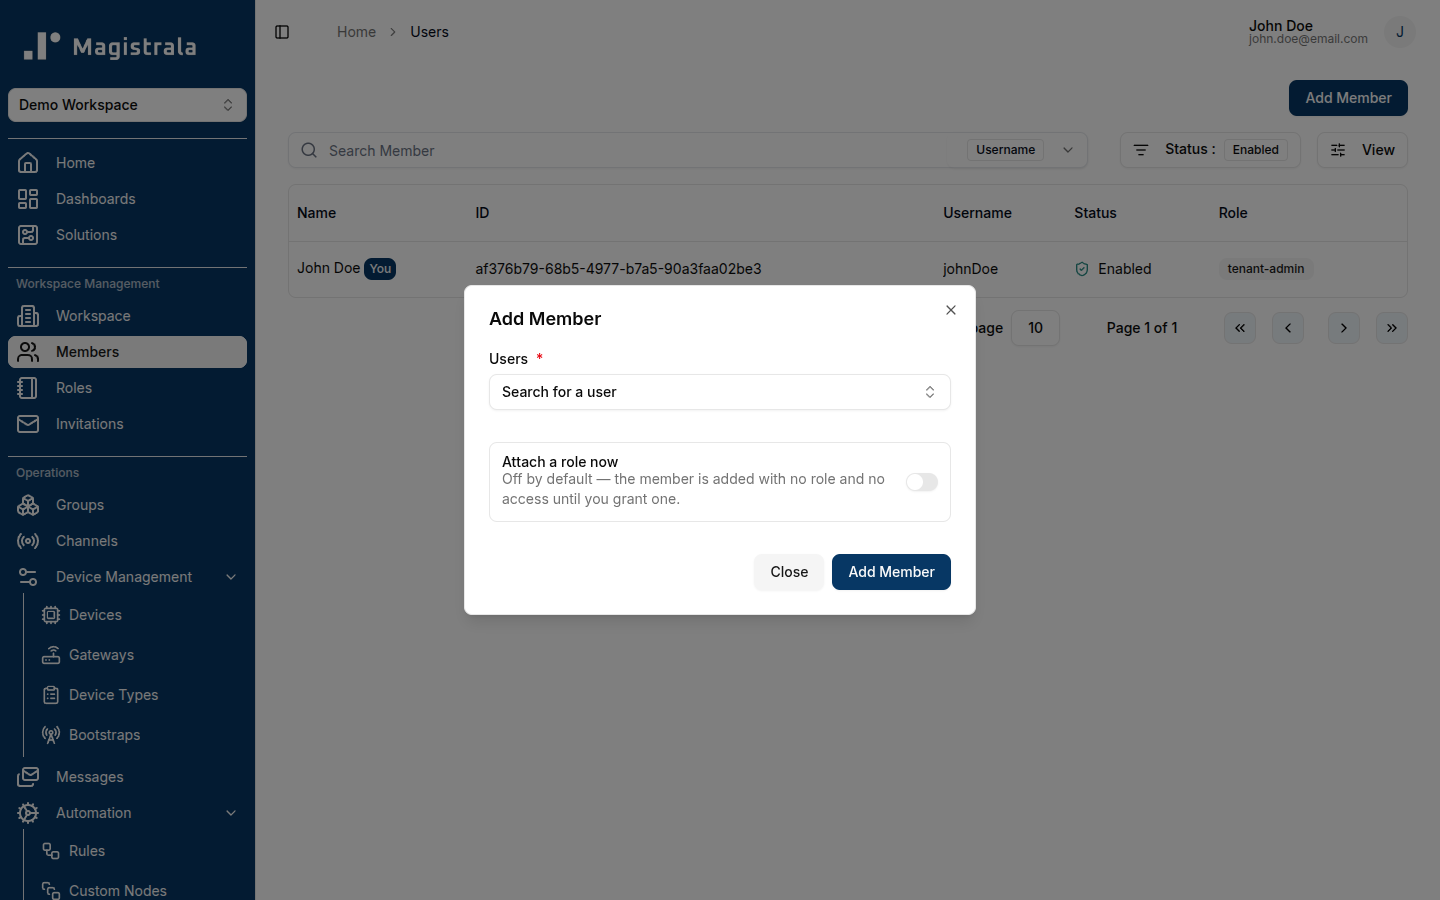
To assign a user to a workspace, click the Assign User button.
Search for the user by their username, then select their name and choose a role to assign.
Alternatively, a user can also be added while creating the workspace role.
Unassign Users
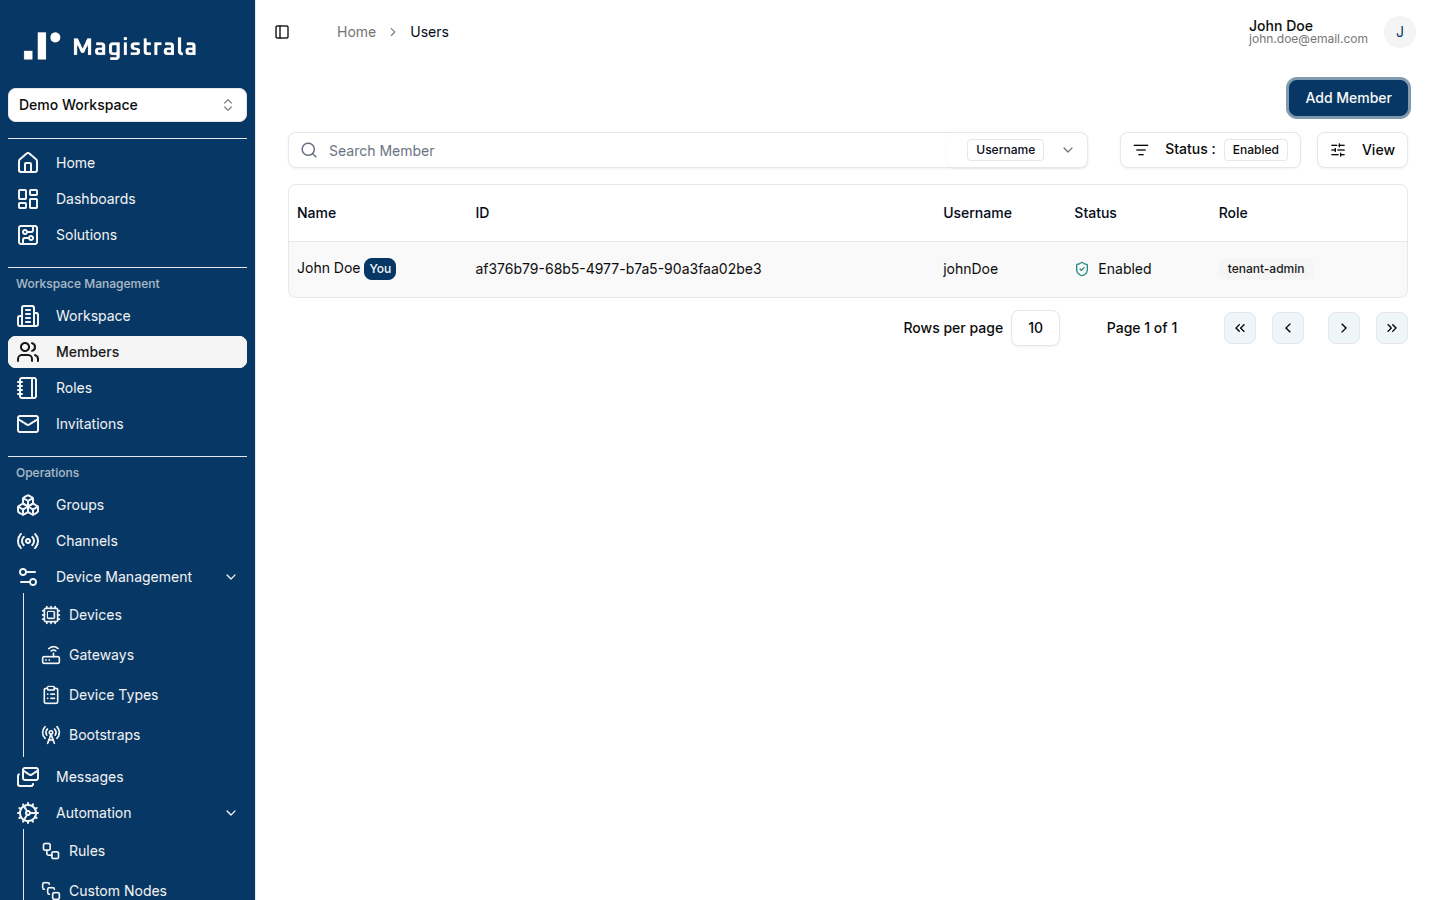
To unassign a user, click on the trash icon present on their row and click Unassign on the popup to confirm the action.
Workspace Roles
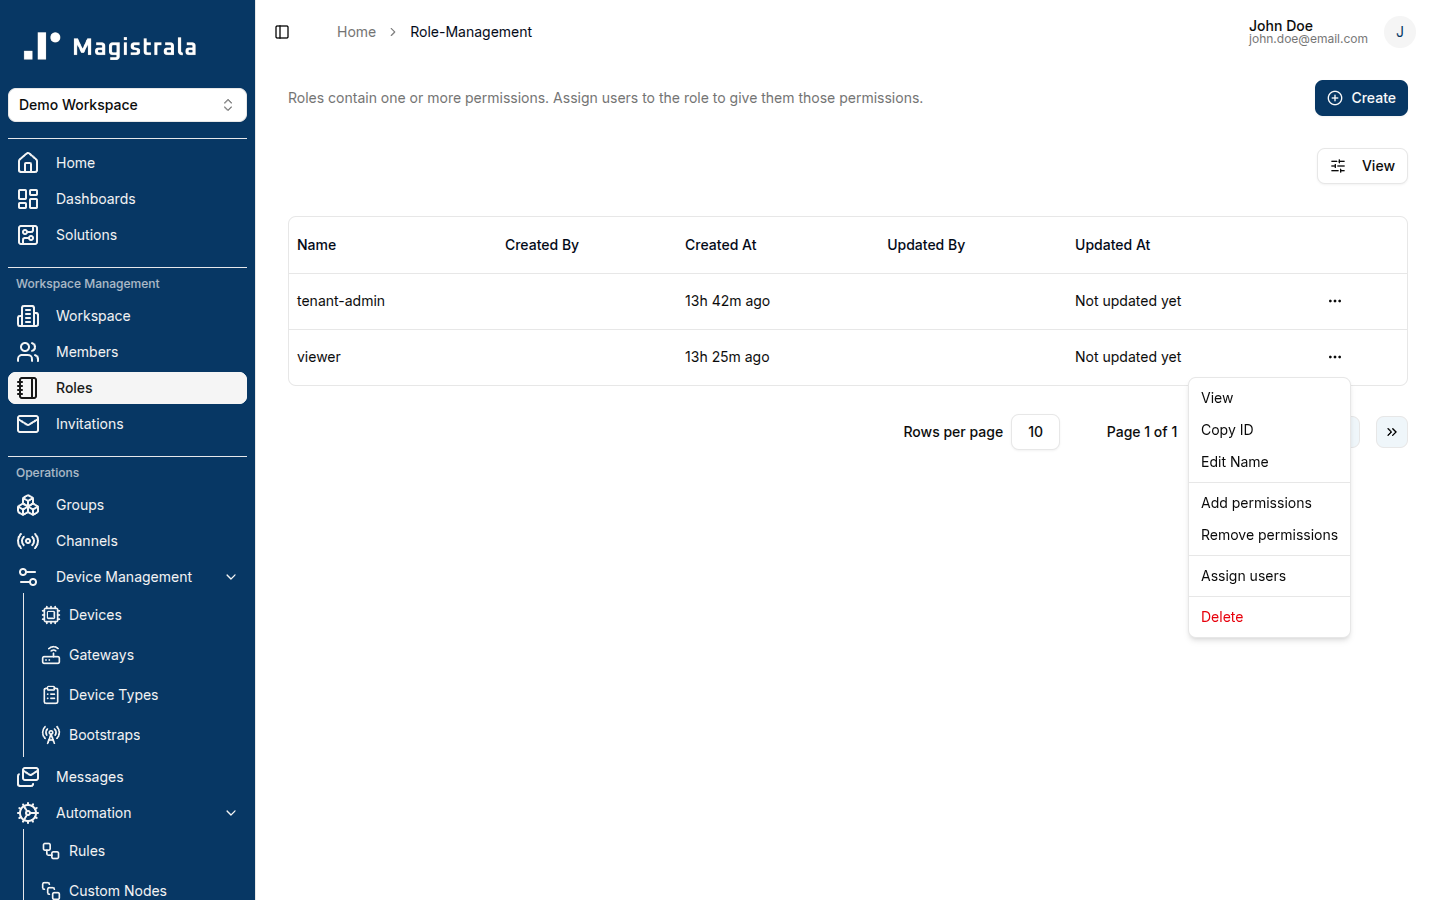
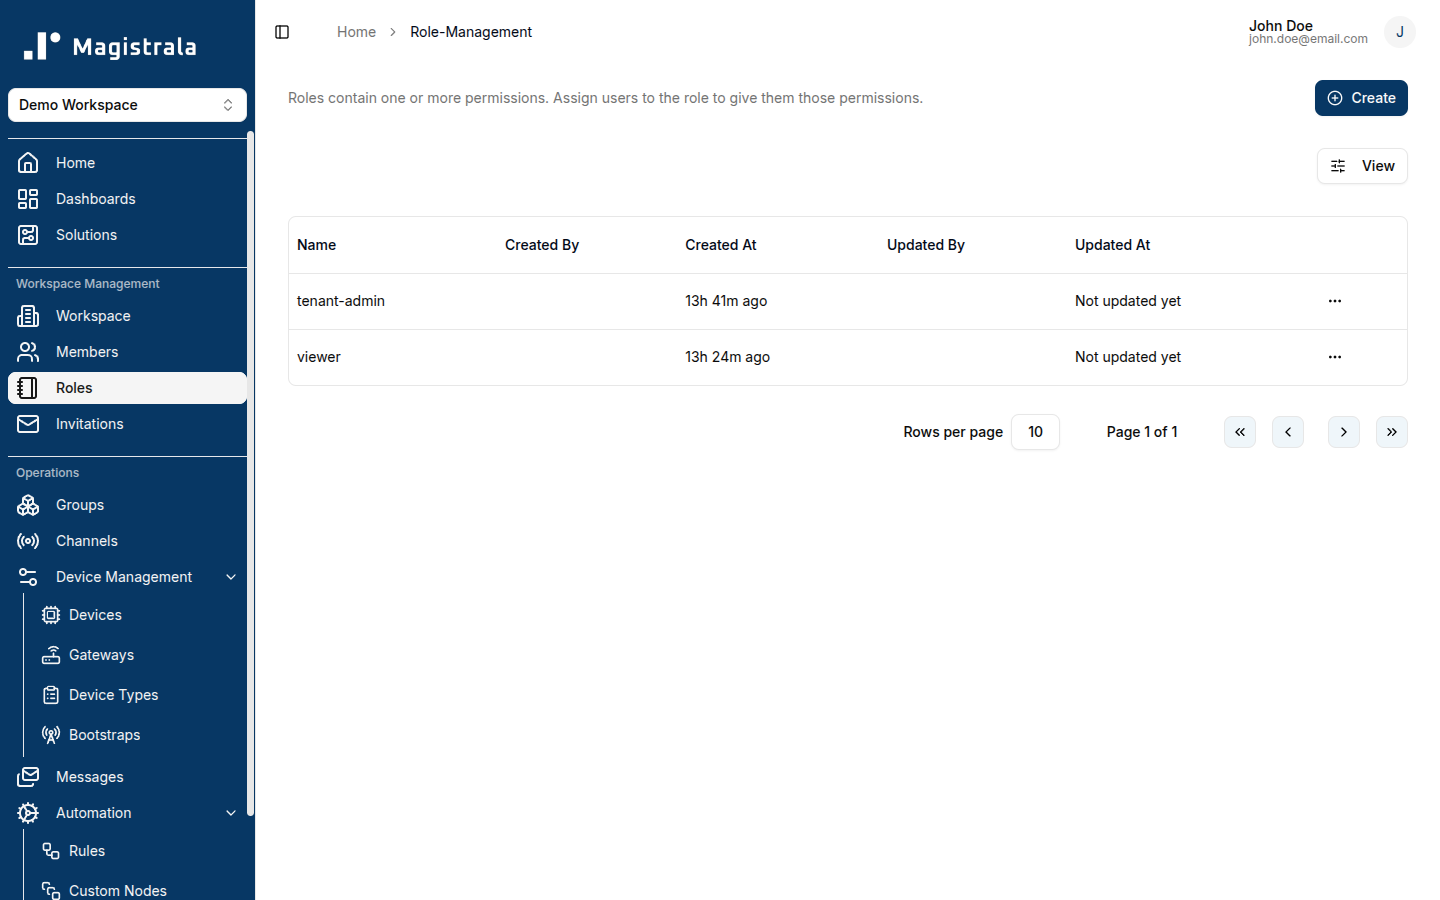
From the Roles section, you can create new roles built out of one or more permission blocks.
By default, an admin role with complete control over the workspace is always present and granted to the workspace creator. The Roles table lists each role's Name, Created By, Created At, Updated By and Updated At.
Roles are no longer built from a long list of per-entity action names (for example client_create or channel_publish). Instead, each role is made up of one or more permission blocks, and each block pairs a scope with a set of generic actions:
Scopes — what the permission block applies to:
- Whole workspace
- All devices
- All channels
- All groups
- All rules
- All reports
- All alarms
Actions — what's allowed for that scope:
- read
- write
- delete
- publish
- subscribe
- manage
- role.manage
- policy.manage
- execute
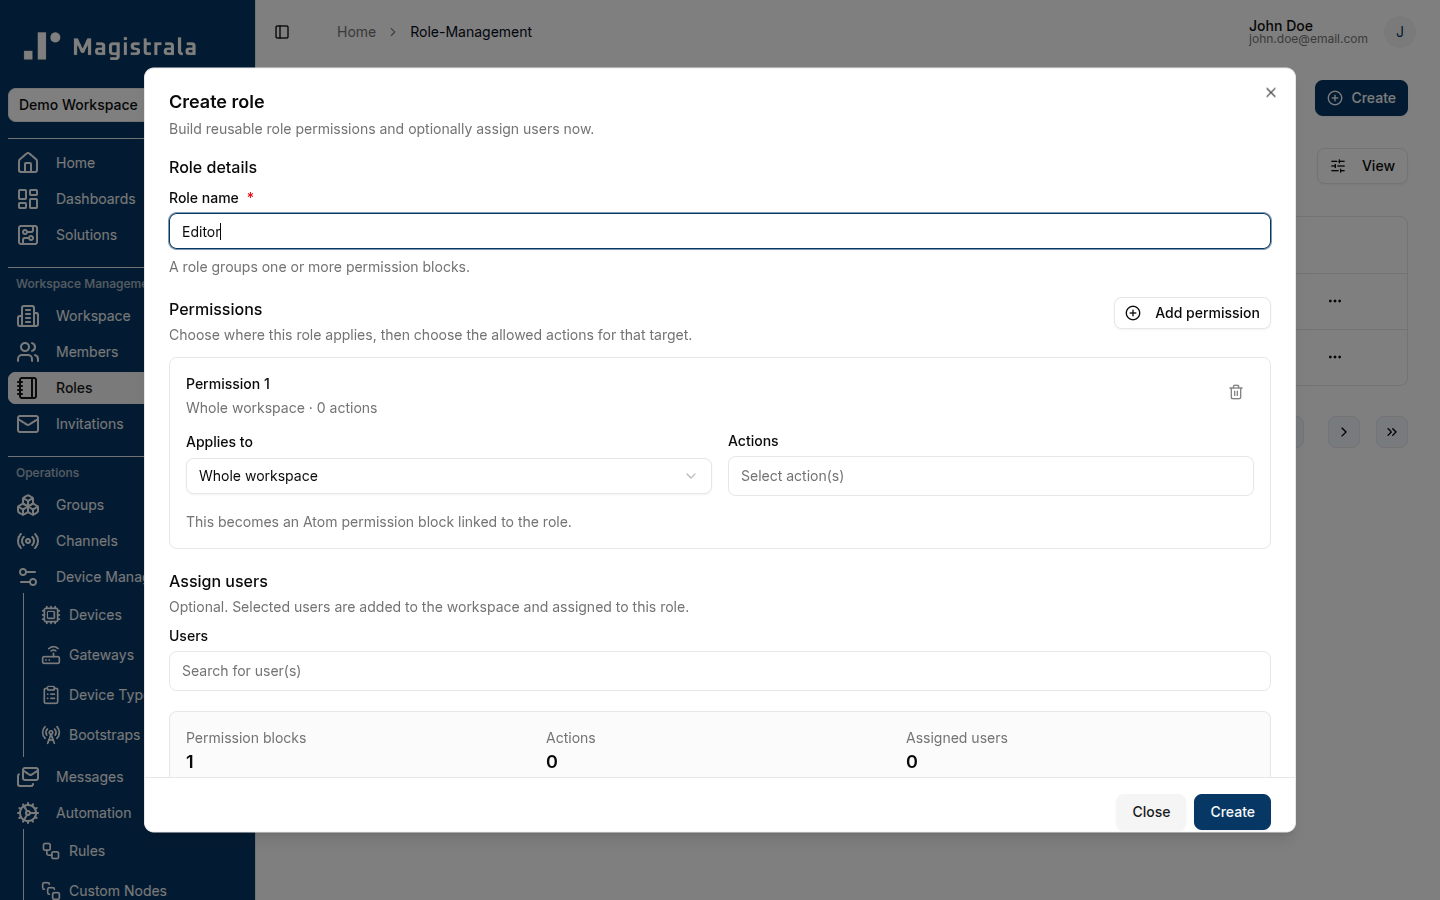
To create a new role, click the + Create button, provide a descriptive Role name, then click Add permission to add a permission block — choose what it Applies to and select one or more Actions. You can add multiple permission blocks to a single role, and optionally assign users to the role at creation time.
Once created, workspace roles can be edited from their respective pages. A role's page shows its Name and ID, its Permission scopes (each scope card lists its actions and has buttons to Add actions, Remove actions or Delete scope, plus an Add scope button to add another permission block), and an Assignments table of the users currently holding the role, with Add Members and Delete All Members actions.
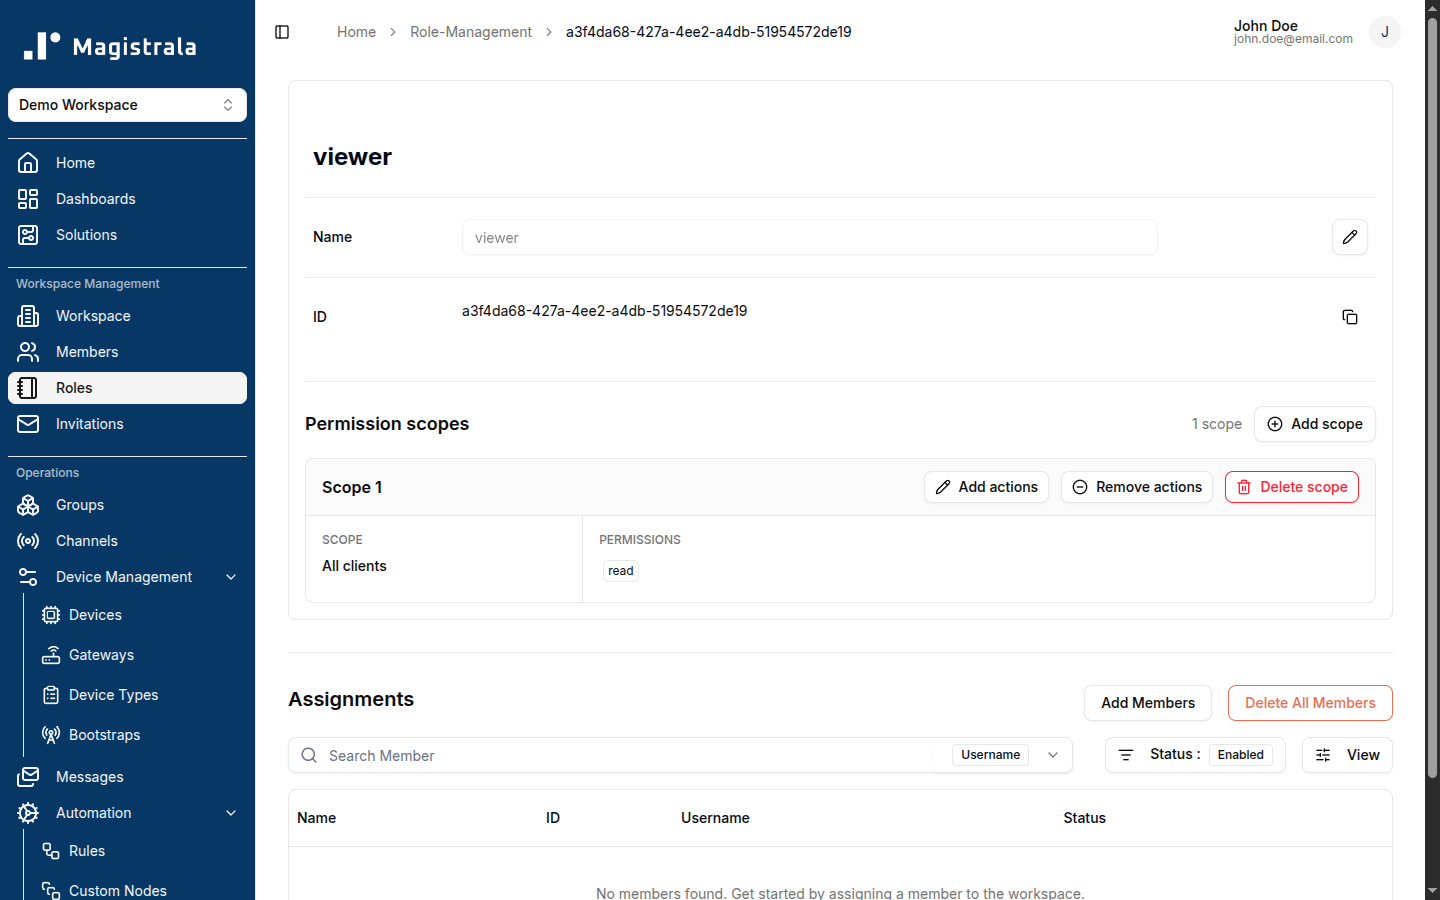
These same fields can also be updated from the roles list via the row's ··· menu — View, Copy ID, Edit Name, Add permissions, Remove permissions, Assign users, and Delete.